If you’re on the hunt for a delicious treat that satisfies both your sweet tooth and dietary needs, these gluten-free and vegan peanut butter and chocolate bars are your new best friend! Whether you’re gluten intolerant, vegan or just looking for a healthier dessert option, this recipe is a perfect blend of indulgence and nutrition.

How to make my Gluten Free Vegan Peanut Butter and Chocolate Bars
These bars combine the rich, creamy taste of peanut butter with the irresistible creaminess of chocolate—without any gluten! They’re easy to make, require no baking, and use simple ingredients.
Ingredients Breakdown
- Gluten-Free Oat Flour: Provides a sturdy, nutritious base that’s naturally gluten-free. Oat flour is high in fiber and adds a slightly sweet, nutty flavour to the bars.
- Natural Peanut Butter: Choose creamy peanut butter for the best texture. It adds protein and a rich, nutty taste. My favourite has to be Pip and Nut’s Peanut butter!
- Maple Syrup or Honey: These natural sweeteners add just the right amount of sweetness without overpowering the bars.
- Vanilla Extract: A generous amount of vanilla enhances the overall flavour and brings out the sweetness in the other ingredients.
Chocolate Layer:
- Dairy-Free Milk Chocolate Chips and/or Dark Chocolate chips: For a rich chocolate flavour that’s also dairy-free, opt for high-quality chocolate chips or a dark chocolate bar.
- Coconut Oil: Melting the chocolate with a bit of coconut oil ensures a smooth, glossy finish that sets perfectly.
Optional Toppings:
- Chopped Peanuts: For added crunch and a burst of peanut flavor.
- Sea Salt Flakes: A sprinkle of sea salt elevates the sweetness and adds a gourmet touch.
Step-by-Step Recipe
Step 1: Prepare the Base Layer
In a medium-sized mixing bowl, combine the gluten-free oat flour, natural peanut butter, maple syrup or honey, and vanilla extract. Stir until smooth and well-combined. Press the mixture evenly into the bottom of a dish lined with parchment paper.
Step 2: Prepare the Chocolate Layer
Melt the dairy-free milk chocolate chips and/or dark chocolate along with coconut oil. You can do this in a microwave-safe bowl, heating in 20-second intervals and stirring in between until smooth. Pour the melted chocolate over the chilled peanut butter base, spreading it evenly with a spatula.
Step 4: Add Optional Toppings
If you’re feeling extra fancy, sprinkle chopped peanuts and a pinch of sea salt flakes over the chocolate layer. This adds a delightful crunch and a hint of savory flavor.
Step 5: Set the Bars
Place the dish back in the freezer for 20-30 minutes until the chocolate is firm.
Step 6: Slice and Serve
After the bars have set, remove them from the freezer and let them sit at room temperature for a few minutes. Lift the parchment paper out of the dish, place it on a cutting board, and slice the bars into squares or rectangles.
Step 7: Store and Enjoy
These bars store wonderfully in an airtight container in the refrigerator for up to a week. If you’d like to keep them longer, they also freeze well—just thaw them for a few minutes before enjoying.
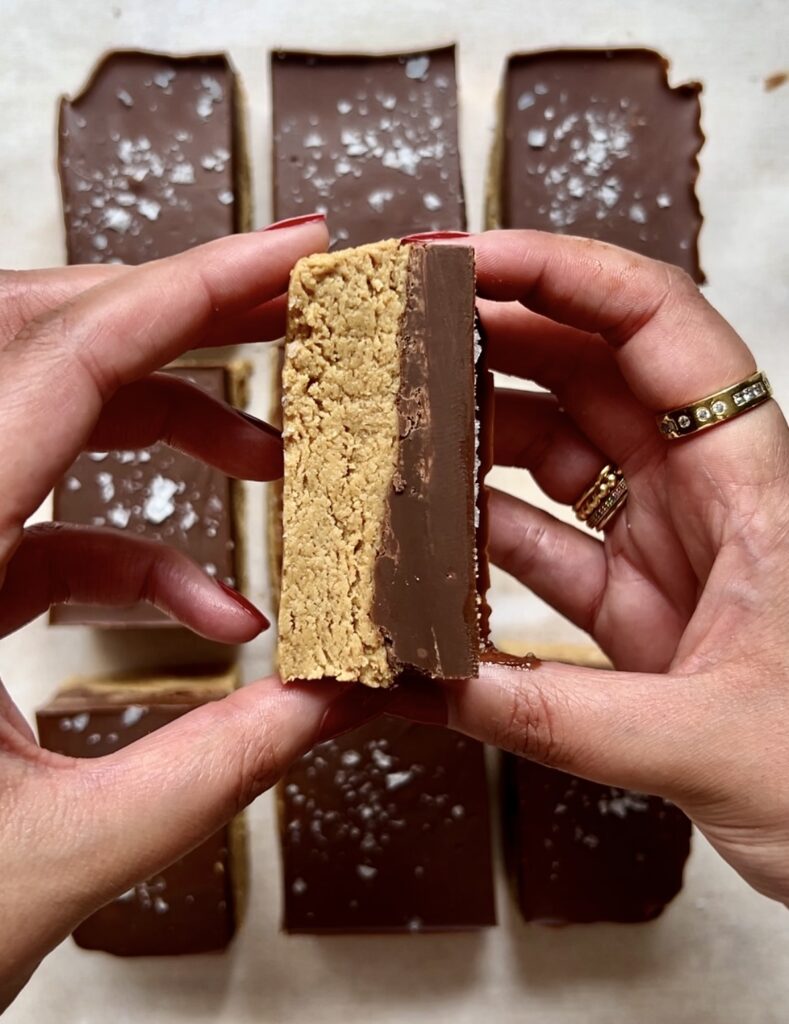
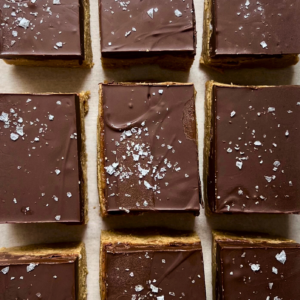
Gluten Free Vegan Peanut Butter and Chocolate Bars
Ingredients
- 180 g peanut butter
- 2 tbsp honey or maple syrup
- 1 tsp vanilla extract
- 180 g oats
- 200 g milk chocolate chips
- 200 g dark chocolate chips
- 1 tsp sea salt
Instructions
Step 1: Prepare the Base Layer
- Begin by adding the oats into a blender or food processor and blitz until a fine oat flour forms.
- In a medium-sized mixing bowl, combine the gluten-free oat flour, natural peanut butter, maple syrup or honey, and vanilla extract. Stir until smooth and well-combined. Press the mixture evenly into the bottom of a dish lined with parchment paper.
Step 2: Prepare the Chocolate Layer
- Melt the dairy-free milk chocolate chips and/or dark chocolate along with coconut oil. You can do this in a microwave-safe bowl, heating in 20-second intervals and stirring in between until smooth. Pour the melted chocolate over the chilled peanut butter base, spreading it evenly with a spatula.
Step 5: Set the Bars
- Place the dish back in the freezer for 20-30 minutes until the chocolate is firm.
Step 6: Slice and Serve
- After the bars have set, remove them from the freezer and let them sit at room temperature for a few minutes. Lift the parchment paper out of the dish, place it on a cutting board, and slice the bars into squares or rectangles.
- If you’re feeling extra fancy, sprinkle chopped peanuts and a pinch of sea salt flakes over the chocolate layer. This adds a delightful crunch and a hint of savory flavor.
Step 7: Store and Enjoy
- These bars store wonderfully in an airtight container in the refrigerator for up to a week. If you’d like to keep them longer, they also freeze well—just thaw them for a few minutes before enjoying.
If you like the look of my Chocolate Peanut Butter Dates then you should definitely check out the recipes below for some more amazing dessert ideas:
